
Games, art, life and anything else that spills out of my head that really, really shouldn't get out...
Showing posts with label Spacewolves. Show all posts
Showing posts with label Spacewolves. Show all posts
Thursday, April 14, 2011

Wednesday, April 13, 2011
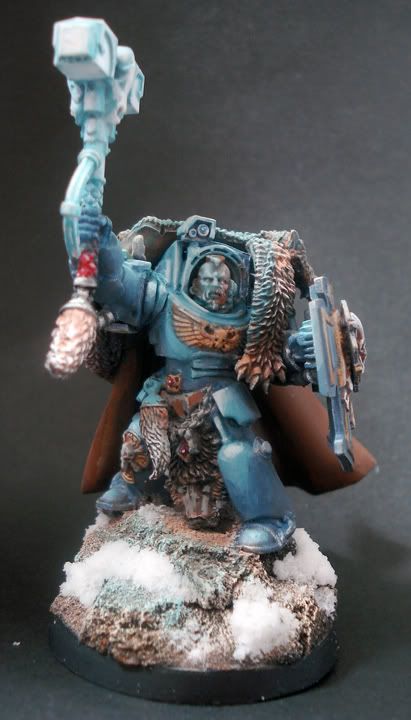
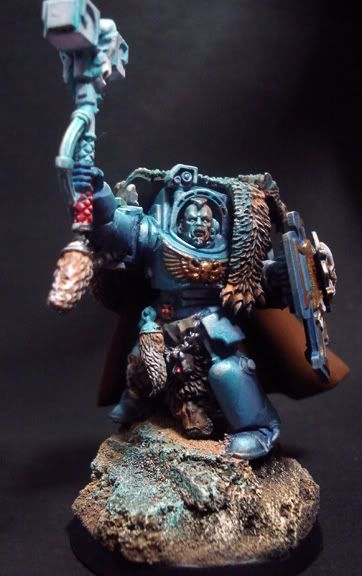
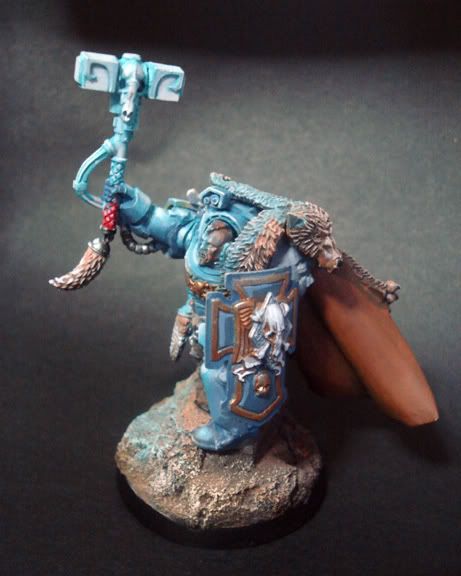
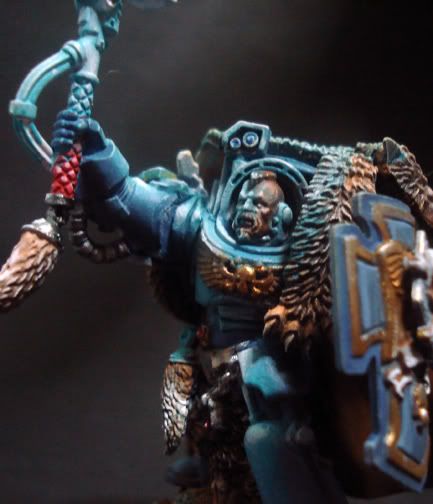
Project 365: Day 80 - Spacewolf Terminator with Thunderhammer Finished
Apart for some touch-ups, I'm calling this dude done. A bit messy on some parts but should be enough for tabletop:

The 3 color priming technique I used here is interesting. I may find myself using it more in the future :)
I'm also debating on whether I should put snow on the base...
C&C much appreciated
 |
| Golds getting washed out by the lighting here... |
 |
| Dramatic shot |
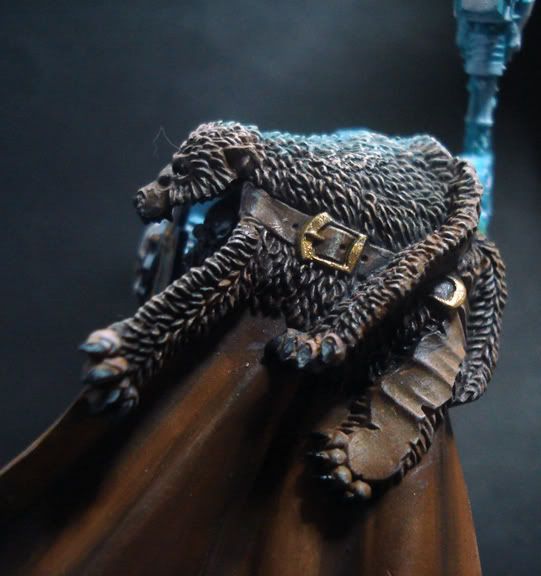 |
| Coat detail. Did some washes in bands here to create some subtle fur patterns like what real animals would have |
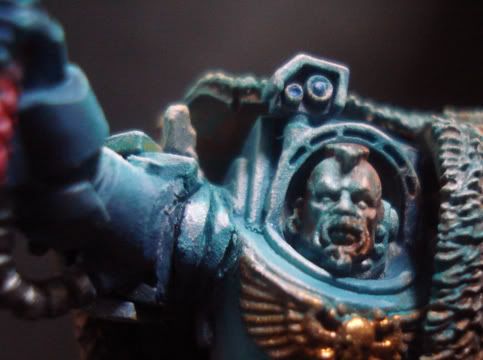 |
| Closeup of the face. You can see the seams of the greenstuff work I did. I really need to get better with my sculpting skills |
I'm also debating on whether I should put snow on the base...
C&C much appreciated
Wednesday, April 6, 2011
Project 365: Day 77 - Space Wolf Terminator with Thunderhammer Part 2
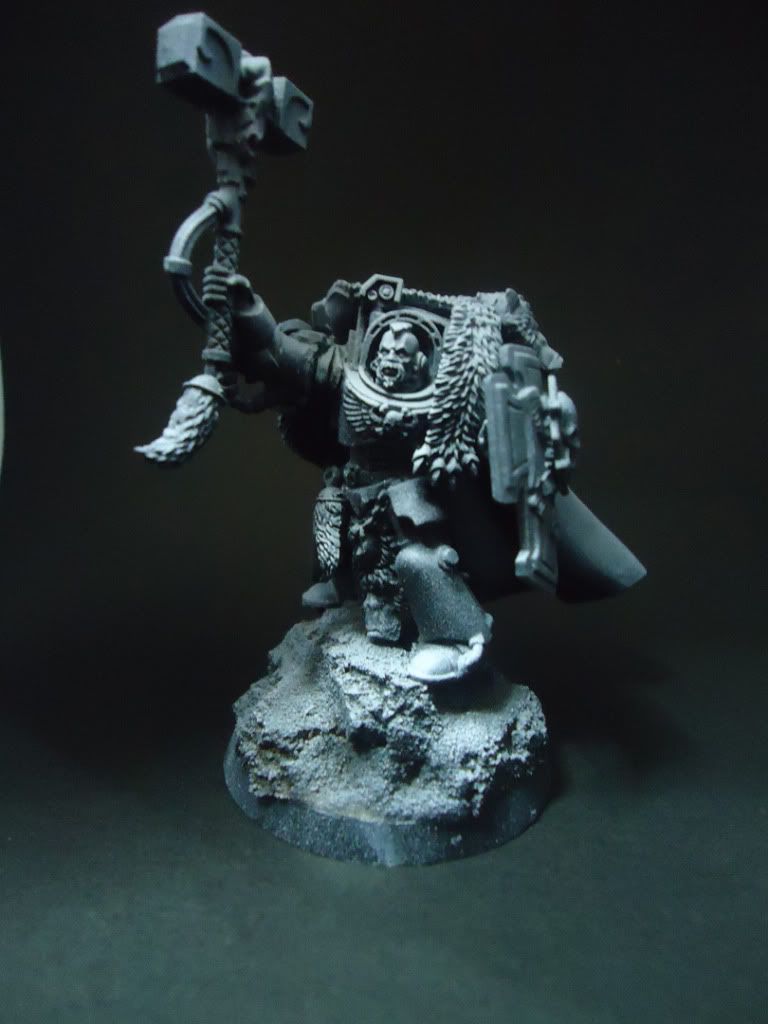
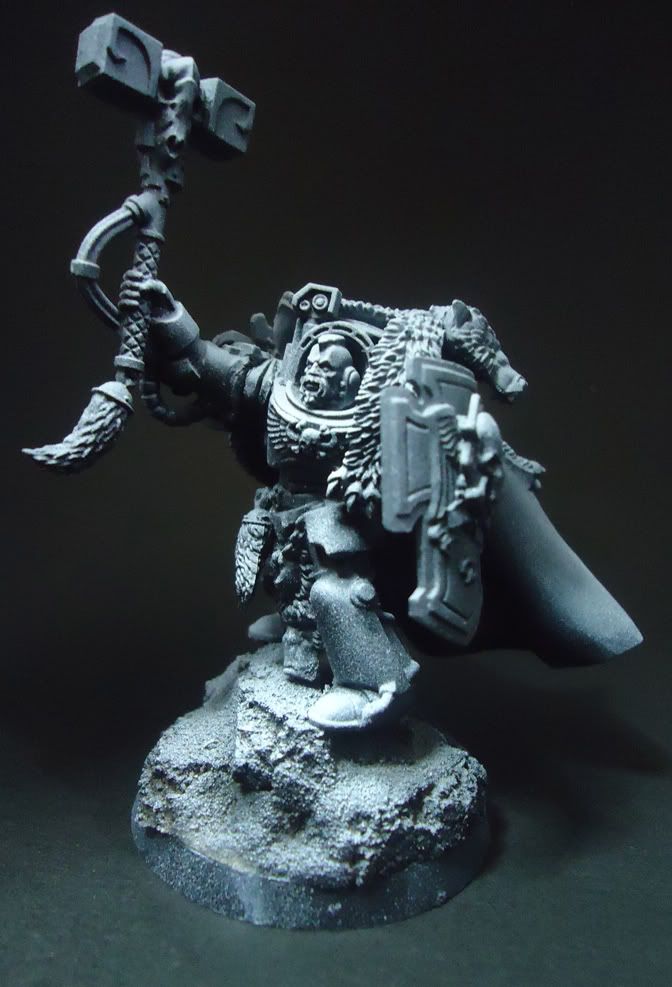
Primed Thunderhammer-er. Primed from black, to grey and white to help me with zenithal lighting.

 Decided to try this out after seeing that No Quarter article from Privateer Press as well as this link:
http://www.helldorado.fr/figurines/helle-moller-step-by-step-painting-guide-by-thomas.php
Thanks to Junex for the link :)
http://www.helldorado.fr/figurines/helle-moller-step-by-step-painting-guide-by-thomas.php
Thanks to Junex for the link :)
Sunday, April 3, 2011
Project 365: Day 70 - Spacewolf Dread WIP Part 4
Finally got a camera and I've got pics!


Just a bit of cleanup around the base and I'm calling this done. Wish I planned this out more (was thinking of doing stained glass effects on the shins but I got stuck in the planning and I didn't know if i could pull it off) but I don't think its that bad for my first dread and it's really just Tabletop quality :) Hopefully I can get to do something a little crazier when another dread comes my way.
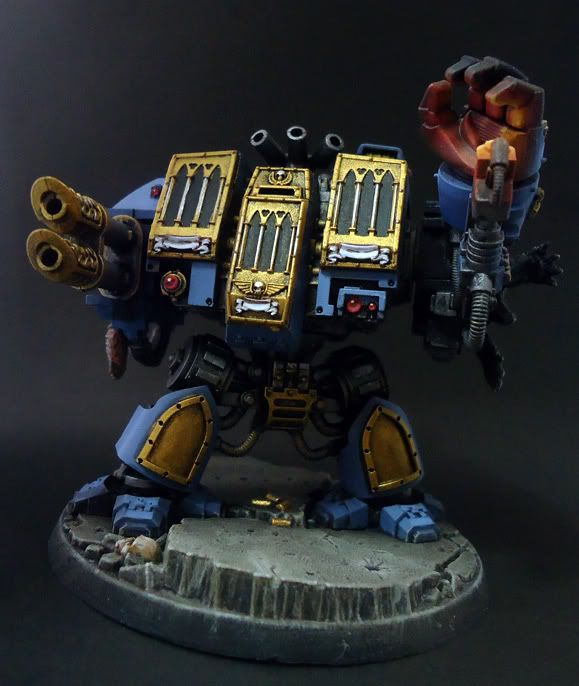
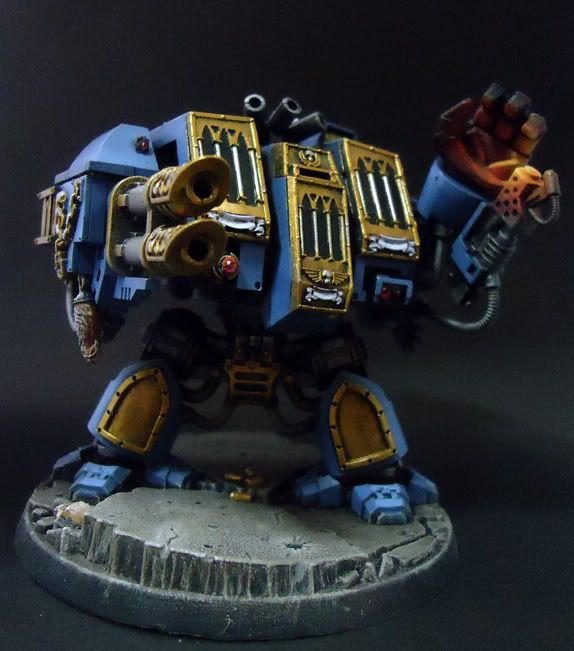
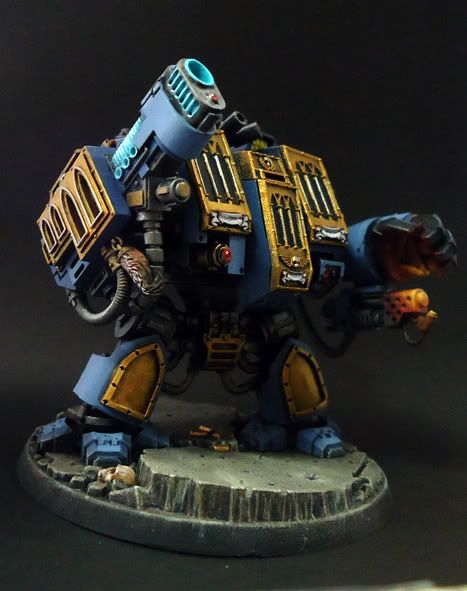
Just a bit of cleanup around the base and I'm calling this done. Wish I planned this out more (was thinking of doing stained glass effects on the shins but I got stuck in the planning and I didn't know if i could pull it off) but I don't think its that bad for my first dread and it's really just Tabletop quality :) Hopefully I can get to do something a little crazier when another dread comes my way.
Sunday, March 20, 2011
Project 365: Day 66 - Spacewolf Dread WIP Part 3
Part 2 can be found here.
More work on the Spacewolf Dreadnaught. Just basecoats and some drybrushing. Also note the beginnings of OSL work on the flamer and hand.
What do you think?
I really don't know what direction I'm going with this dreadnaught. Note the shins and the sarcophagus panels. French Arches and trefoils make me think of going "stained glass windows" on the shins for a "church" look. But this is a Spacewolf 'naught so...yeah. Not the most religious folks out there.
More work on the Spacewolf Dreadnaught. Just basecoats and some drybrushing. Also note the beginnings of OSL work on the flamer and hand.
What do you think?
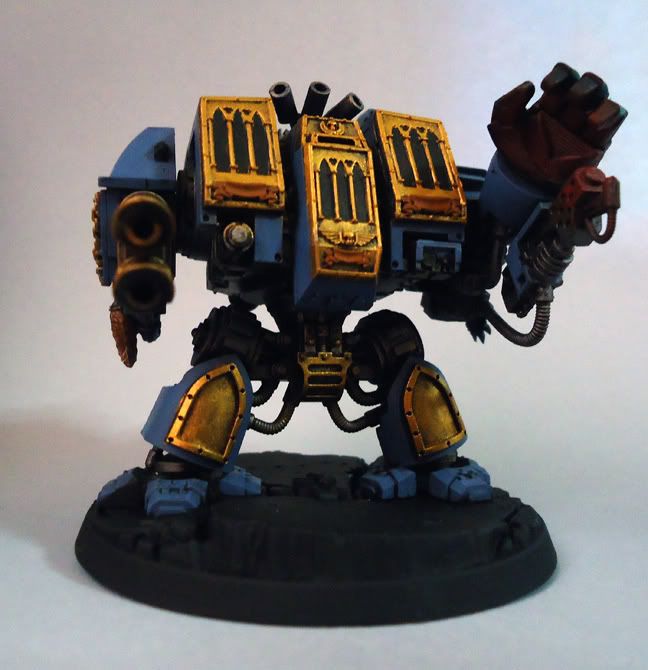 |
| I'm thinking of making the flamer and the immediate area round it glow hot as if he'd been firing his flamer for a good while. |
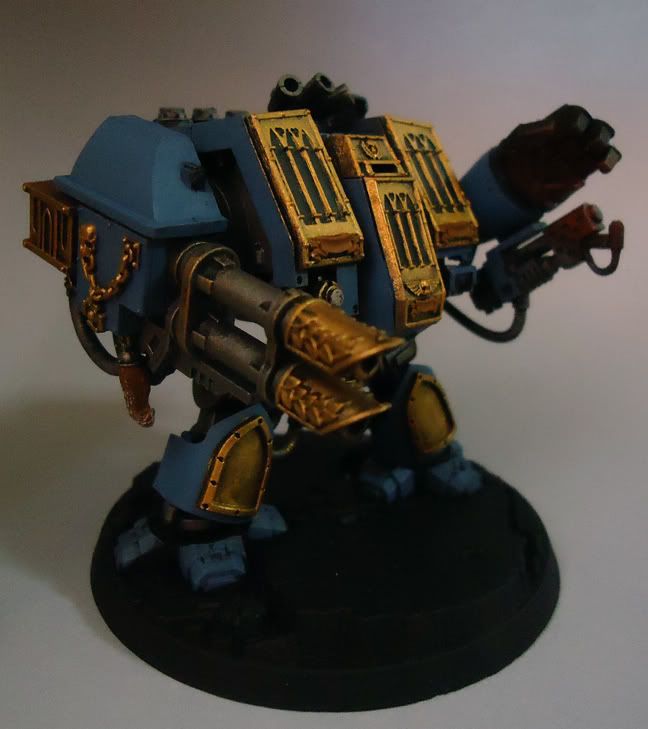 |
| A better view of the twin cannons |
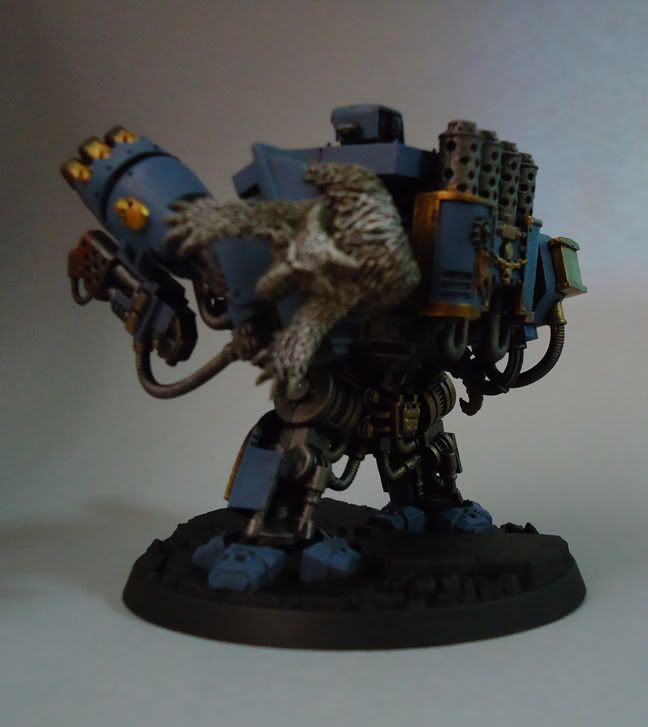 |
| I may tweak the colors of the pelt a bit... |
Saturday, March 12, 2011
Project 365: Day 60 - Spacewolf Dread WIP Part 2
If you haven;t, please make sure to check out Part 1.
Wasn't able to get a lot done on this particular model due to some unforseen developments. I was able to prime the dread as you can see below.
Stay tuned for Part 3.
Wasn't able to get a lot done on this particular model due to some unforseen developments. I was able to prime the dread as you can see below.
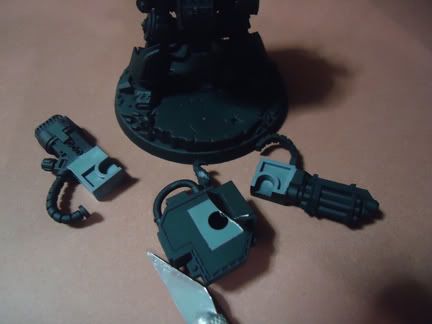 |
| Here I sliced off the tape covering the holes and tabs. I also removed the tape covering the insert tabs for the weapons options. I did this to make sure that the attachment points are not too snug from that layer of primer. If i primed over the tabs, the primer will scrape off or worse yet gum and jam up the insertion point and break a tab. |
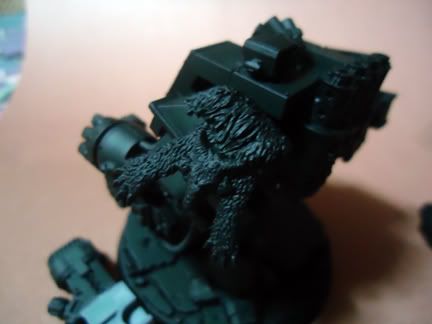 |
| Here you can see the greenstuffed fur nicely blending in with the rest of the fur. You can hardly tell it wasnt part of the model unless you were looking for it. |
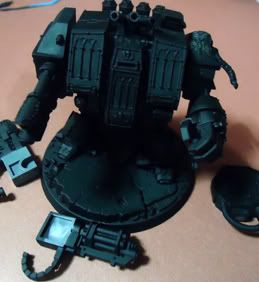 |
| Arms attached and this guy is ready for drybrushing and basecoating. |
Stay tuned for Part 3.
Monday, March 7, 2011
Project 365: Day 58 - Spacewolf Dread WIP Part 1
Fuck I'm way behind on my commission work
Anyway, I finally got some work done. Primed 12 (?) spacewolves for Felix and worked on his dreadnaught. This would be the first time painting a 40k dreadnaught so this ought to be fun.
Normally when taking tabletop work I dont assemble and paint them as is. Not being an expert in WH40k I really wouldnt know the weapons configurations and WYSIWIG madness. I paint them as they come.
Sometimes though they come in states that would require repair. This time, the dread just came a little...unfinished.
I'll prime this bad boy up and post the succeeding steps here so stay tuned.
Part 2 is up!
Anyway, I finally got some work done. Primed 12 (?) spacewolves for Felix and worked on his dreadnaught. This would be the first time painting a 40k dreadnaught so this ought to be fun.
Normally when taking tabletop work I dont assemble and paint them as is. Not being an expert in WH40k I really wouldnt know the weapons configurations and WYSIWIG madness. I paint them as they come.
Sometimes though they come in states that would require repair. This time, the dread just came a little...unfinished.
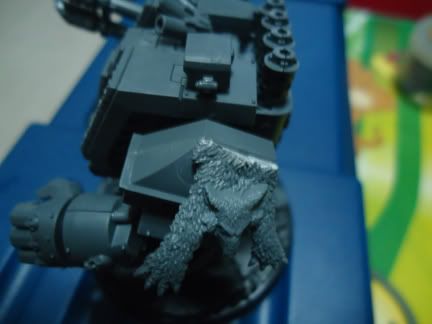 |
| The dreadnaught is decorated with this fur piece. You can see clearly where the cut was made. |
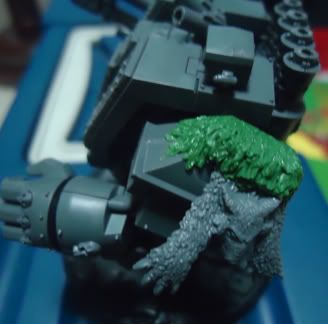 |
| A little greenstuff camouflages the problem. |
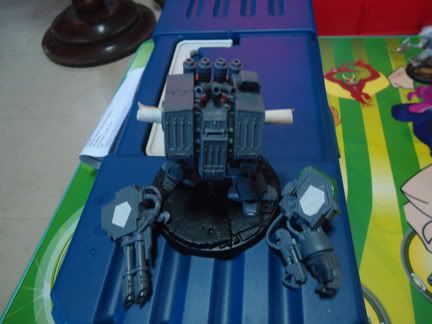 |
| I tape up the peg and holes before priming. |
I'll prime this bad boy up and post the succeeding steps here so stay tuned.
Part 2 is up!
Friday, February 4, 2011
Project 365: Day 34 - Painting Miniatures - Spacewolves !
The Spacewolves from last post are done:

Armor was a 50/50 Mix of GW Shadow and Spacewolf Gray. I just hit the areas where youll be able to see them,
Gold areas were retouched with GW Shining Gold, fur areas were drybrushed with P3 Bastion Grey, Trollblood Highlight and Menoth White Highlight respectively.
Faces were a progression of GW Bestial Brown, P3 Khardic Flesh and P3 Ryn Flesh.
I spent just a little more time on these two faces than others:


So there ya have it :) Spacewolves at Tabletop Quality. Took me a total of 4 and a half hours to finish ten models all in all.
Comments and Critiques much appreciated.

Armor was a 50/50 Mix of GW Shadow and Spacewolf Gray. I just hit the areas where youll be able to see them,
Gold areas were retouched with GW Shining Gold, fur areas were drybrushed with P3 Bastion Grey, Trollblood Highlight and Menoth White Highlight respectively.
Faces were a progression of GW Bestial Brown, P3 Khardic Flesh and P3 Ryn Flesh.
I spent just a little more time on these two faces than others:


So there ya have it :) Spacewolves at Tabletop Quality. Took me a total of 4 and a half hours to finish ten models all in all.
Comments and Critiques much appreciated.
Tuesday, February 1, 2011
Project 365: Day 32 - Painting Miniatures - Spacewolves WIP
Getting some painting commitments out of the way and getting a blog post to boot. Sweet!
Here are some of Felix's Spacewolves after their initial drybrushing and basecoats on black primer. This is strictly tabeltop so no fancy tricks just some good old fashioned elbow grease.
When painting whole squads of figures I usually try to do them assembly line style. I start with drybrushing the metals down, in this case the golds (P3 Rhulic Gold) and the iron (Mix of P3 Radiant Platinum and Thamar Black). I also drybrushed the resin bases with a progression of Citadel Bestial Brown, Citadel Bubonic Brown and P3 Ryn Flesh.
With the messy drybrushing done I then worked on the basecoats. The heads were done with straight GW Bestial Brown and since I was working on "new school" 'wolves the power armor was done with GW Shadow Grey.
You'll notice I dont try to cover every nook and cranny on the model. This serves several purposes. First, its a shortcut so I get to paint a lot of figs in a short time. Second, if you prime black and you pick your strokes strategically youll be able to outline between armor panels and give some starting shadows just by not painting over the primer.
I keep in mind that when aiming for tabletop quality that youll be seeing the figures 3 feet away from you at an angle, so missing the undersides and corners wont really matter. I just remember to neaten up places that will be seen and be prominent.
For the folks who are Painting Obsessive-compulsives, this may seem like a grave sin but it works for me and my client.
By the way, since a lot of the heads were identical I decided to sculpt some additional features on them like beardy here. Generally, I cant sculpt a damn but fur and hair is doable for me. I added the greenstuff before i primed.
All in all it took me about 2 hours to get 10 marines from primer to this point. I should be able to wrap them up in a couple more days with some more basecoats and some simple highlights so stay tuned :)
Here are some of Felix's Spacewolves after their initial drybrushing and basecoats on black primer. This is strictly tabeltop so no fancy tricks just some good old fashioned elbow grease.
 |
| " In hindsight", Baldir said;"'Cutting your hair with a chainsword was a bad idea..." |
When painting whole squads of figures I usually try to do them assembly line style. I start with drybrushing the metals down, in this case the golds (P3 Rhulic Gold) and the iron (Mix of P3 Radiant Platinum and Thamar Black). I also drybrushed the resin bases with a progression of Citadel Bestial Brown, Citadel Bubonic Brown and P3 Ryn Flesh.
With the messy drybrushing done I then worked on the basecoats. The heads were done with straight GW Bestial Brown and since I was working on "new school" 'wolves the power armor was done with GW Shadow Grey.
You'll notice I dont try to cover every nook and cranny on the model. This serves several purposes. First, its a shortcut so I get to paint a lot of figs in a short time. Second, if you prime black and you pick your strokes strategically youll be able to outline between armor panels and give some starting shadows just by not painting over the primer.
I keep in mind that when aiming for tabletop quality that youll be seeing the figures 3 feet away from you at an angle, so missing the undersides and corners wont really matter. I just remember to neaten up places that will be seen and be prominent.
For the folks who are Painting Obsessive-compulsives, this may seem like a grave sin but it works for me and my client.
 |
| Now he looks like a dwarf slayer! |
All in all it took me about 2 hours to get 10 marines from primer to this point. I should be able to wrap them up in a couple more days with some more basecoats and some simple highlights so stay tuned :)
Subscribe to:
Posts (Atom)