Sunday, May 29, 2011

Project 365: Day 101 - CBD (Cheesesteaks, Burgers & Drinks)

The past weekend we were able to eat at CBD Ayala Triangle. The place is forthcoming with what it serves (Its in the name! yay!) and I do like me some cheesesteak :)

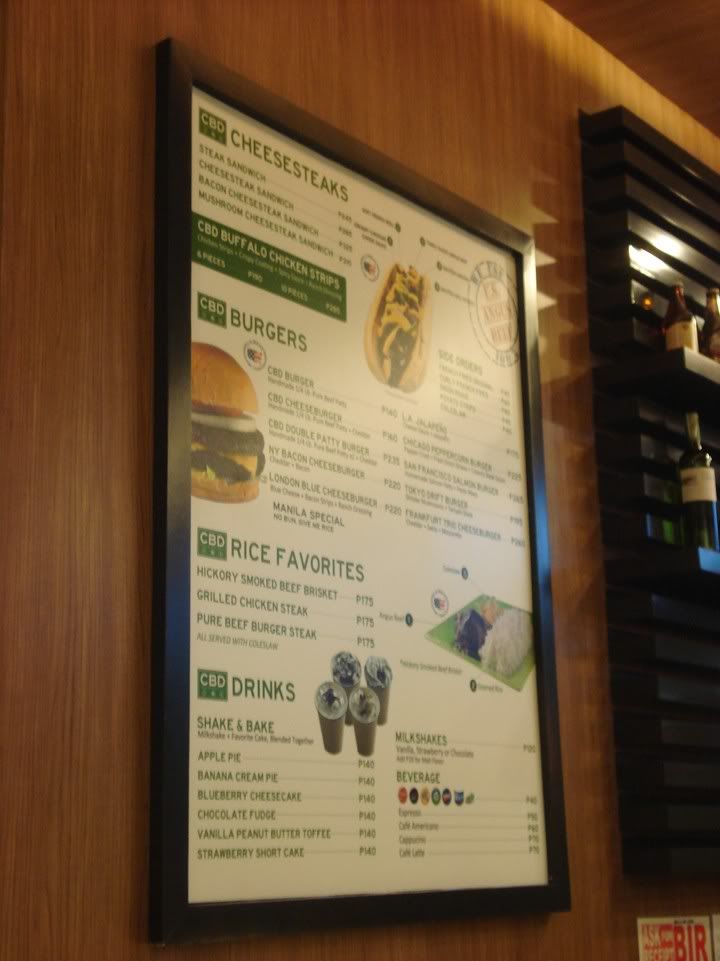
Philly Cheesteak sandwiches are made with green peppers, onions, beef strips in a bun covered with cheese sauce.

I've tried some local Philly cheesesteaks in Charlie's and Army/Navy and Iceberg's and so far Army/Navy seems to be the best one in terms of bang for the buck. Charlie's cheeseteaks just seem to overloaded for me and Iceberg's was nothing notable.

 The place is a bit hoity-toity for me but since its in the Ayala Triangle I guess that's to be expected. The idea of eating a blue-collar lunch in an uptight place just seemed odd to me. While going over the menu, Roxane and I decided to get an order of wings along with a sandwich to split.

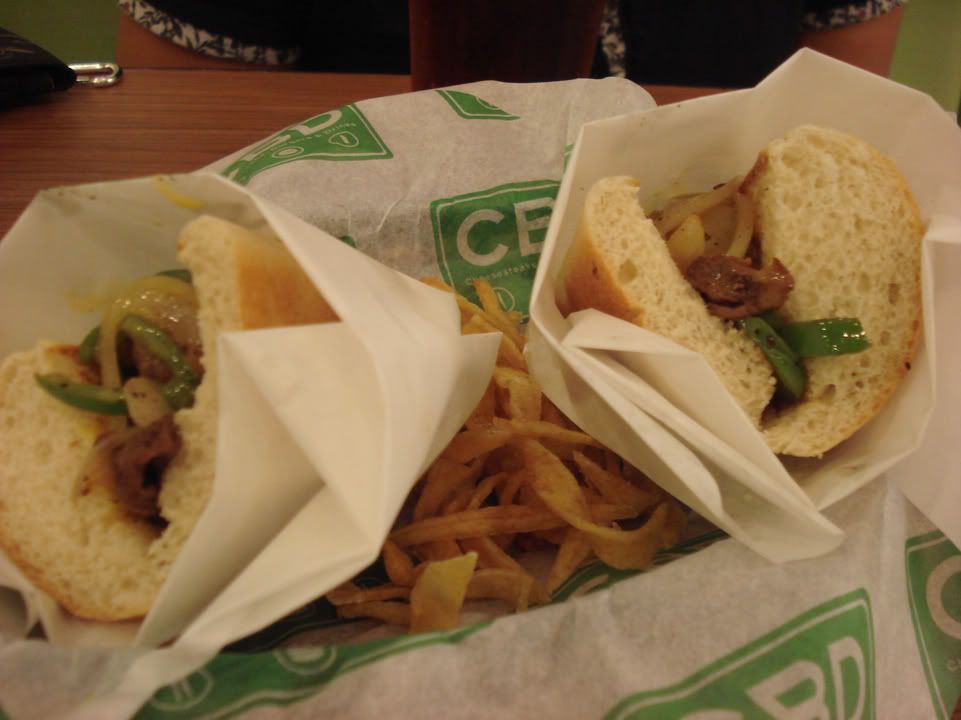
The cheesesteak sandwich. And let me just say that this is just DINKY. Not a good sign to be honest. Flavor-wise its decent, the cheesesauce pretty weak almost making a non-appearance. On the upside, the onions and peppers weren't soggy and the beef was tender. But again, for the price this sandwich is TINY.
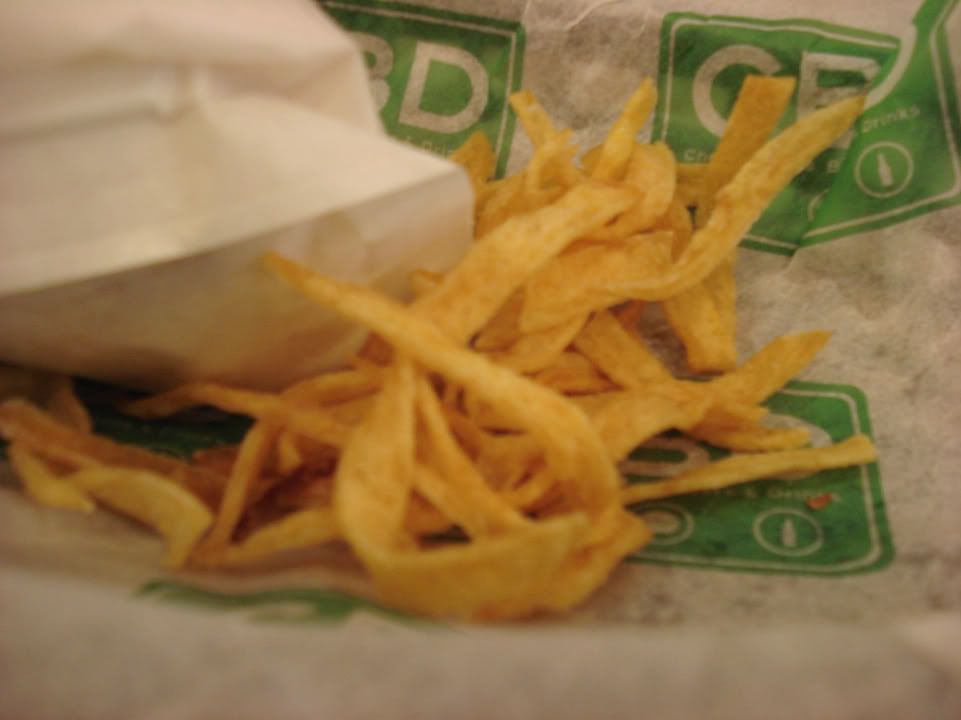
The sandwich came with shoestring potatoes. Meh. Tiny sandwich with a miserly portion of mediocre potatoes :(
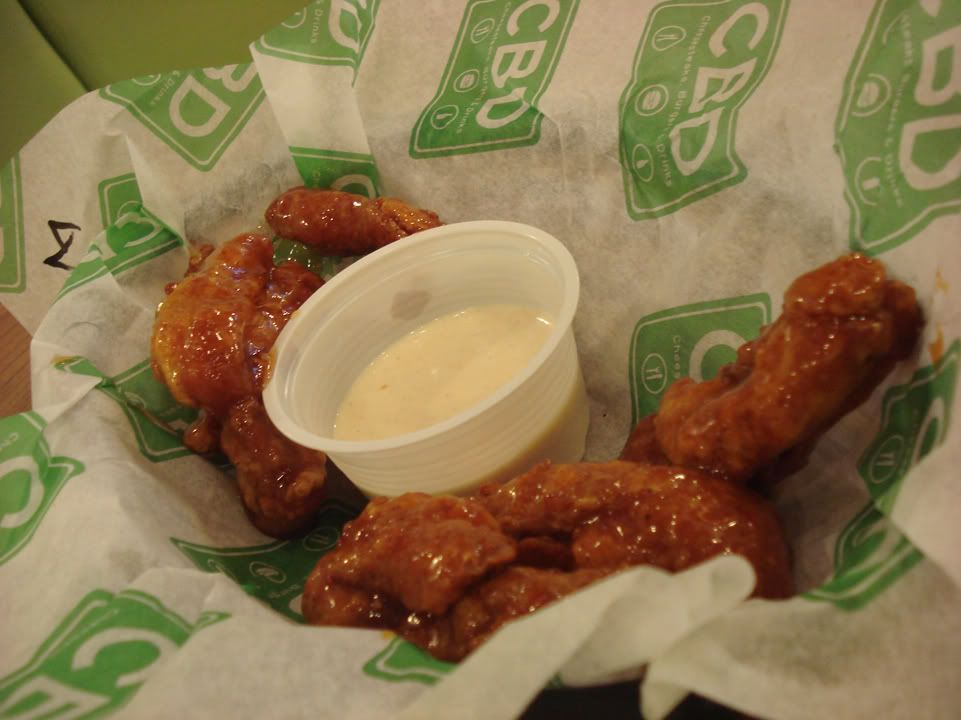
The 6 piece buffalo strips were decent enough. Boneless wings in some pretty tasty sauce, we got both the mild and hot. Roxane liked these better than Chicken Bon Chon's but I disagree. We both agreed that you get better value from Charlie's
Reading everything again, I am coming off as a bit of a Charlie's fanboy. I don't mean to but they pretty much set the benchmark for burgers and wings for me so far in terms of taste and bang for the buck.

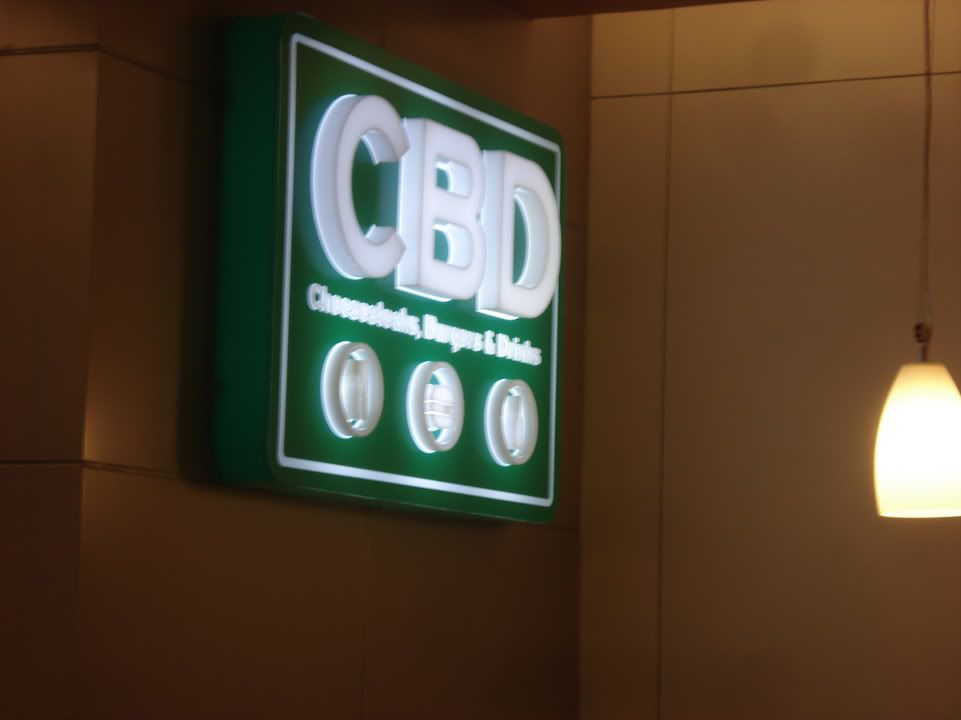
CBD offers tasty decent grub that's let down by small portions and a comparatively high price. I don't mind paying for food as long as I get value in return and CBD just isn't offering that incentive. You'll find better prices and servings elsewhere.

Tuesday, May 24, 2011

Project 365: Day 100 - Oyumaru!

I was about to write another rant but ah, screw that. Let's just get back to fun stuff.

We'll be casting stuff using Oyumaru. Yosh!

I got a packet of Oyumaru from Junex at a pretty good price. Oyumaru is the japanese equivalent of Instamold and from what I can make out from the packet its primarily used for sculpting itself rather than casting. I could be wrong though. There are a lot of youtube videos showing folks how to use instamold so I didnt have to worry about the japanese instructions.

I apologize for the crappy pics. I was taking pics as I went along and I didn't have time to set up a tripod and better lighting.
The festive packet held 7 sticks of material. Seems like a better deal than Instamold in that regard...
You can see that the sticks came in different colors and I decided to use the sparkly one. I promise to keep the Twilight jokes in check.
Oyumaru and Instamold are softened by putting them in hot water for a few minutes...
While the Oyumaru is steeping I went on and prepped the model I was going to cast with talcum powder. In this case, its a Cygnar Cyclone Heavy warjack. Oyumaru supposedly doesn't need a release agent but I didnt want to take chances since this is a painted fig and the fig isn't mine :D
The stuff kneaded easily while hot. You can feel it get cool real quick though...
... so I had to work fast and start pressing it against the part I wanted to cast. I made sure to push the Oyumaru into every nook and cranny well.
After I was satisfied with my mold placement, I cooled the mold with an ice cube so I can pop it off.
I was able to pop the Oyumaru off. I decided a couple minutes on the ice cube should let it set real well.
And here's my mold. You can see the detail that was retained.
I prepped a blob of milliput using talc on my hands to keep it from sticking.
Now this is the part I should've spent more time with in hindsight. I pressed the milliput  into the mold in little pieces to minimize the air bubbles.
The mold flexes a bit but goes back to the shape it had when cooled. I tried to push the milliput in all the crevices as best as I could.
After an hour I was able to pop off the Oyumaru from the milliput. The milliput is still soft at this point but stiff  enough to hold it's shape.

I think my first mold went pretty well. If you look at the last picture closely you'll see some creases and air pockets that I missed. For my purposes though this is perfect. The milliput hardens up really nicely after 24 hours. It's pretty strong but still easily workable. i tried to snap off the smokestacks but I couldnt. Neat!

I'll trim some of the excess milliput off which is easy with a sharp blade and drill holes into the smokestacks.

So what will I be using the finished piece for? Well, the last post should give you a clue ;)

Sunday, May 22, 2011

Project 365: Day 98 - Braaaaaaaaaaaiiiiiinnnsss...

We played this:
http://www.flyingfrog.net/lastnightonearth/

I saw this:
http://emergency.cdc.gov/socialmedia/zombies_blog.asp

and this:

this too:

twas a very zombie weekend :)

Project 365: Day 97 -I'm still here...and you too. So what now?

...

Means I need to get working on my blog :D

Wednesday, May 18, 2011

Project 365: Day 96 - I'm a murderer

I have killed.

I have taken lives. Yes. LIVES. Lives snuffed in an instant. Lives reaped like so much wheat on the blade.

I am damned. The Catholic Church says I am going to hell. I guess I should. I am to be branded. Excommunicated.

I am become Death. Destroyer of worlds.

I shall weep for every one of those lives. Lives of my children. Of my once-future progeny.

 A tear shed for every little wriggly one.

Farewell my sperm, may you rest well in your downy tissue cradle.

Sunday, May 15, 2011

Project 365: Day 95 - Tautauhan - 1st Miniature Painters' Meet

Tautauhan - The Miniature Painters' meet was held this past Saturday, May 14, 2011.

To be honest I wasn't expecting a lot of people to show up in this event but we had a pretty good turn out. I was finally able to put faces on some of the names on MWPH and was finally able to show my admiration of their work in person.

While a little bit warm and muggy as well as a bit chaotic at the start, the folks were game enough to settle in and talk, swap stories and tips, watch some of the painting videos that Jun had with him (with Kim exclaiming at how someone could paint with a #1 to dot spacemarine eyes) and actually get some painting done.

I wish I could've taken more pics but that just wasn't possible with a lot of distractions and I was really enjoying the company of people who shared the same passion in painting little man-dollies. I know Kim has more so I'll just nab some from him when I can.

Junex and Roetengco
Jojobrets' Brettonian Lady(?) on horseback
Junex with his visors at work
A sot of the work table. Note for next event: BRING SPEAKERS
Jojobrets getting a couple of games in
checking out some man-dollies
Daidoji (Roy) painting some Blood Angels
Jojo's demon taking out some hapless Brettonians
Harold and Roy discussing stuff over siomai. You can barely see Roxane here.
I thought I broke Jojo's really pretty Skaven Bell...Thank God the thing was meant to come off
Winding down: (L-R) Jun, Jojo, Taks, Kim, Arvin and Roy
After all was said and done, the paint pots put away and the trash cleaned up, we were already talking about a second meet sometime soon.

I would like to extend heartfelt thanks to:

Sir Lito for allowing us to use the venue and actually dropping by :),

to Arvin for giving us a rundown on IPMS and for giving some of us a goal to aim for

to Kim, for being the keeper of the keys and helping us organize. Always the first one to arrive and the last one to leave.

to those who came to play: Wolf, Taks, Jake, Mark (and his patient GF?) and the dude with the Brettonians

a huge honking pile of thanks for the folks who attended: jojobrets, roetengco, Perry, secretsix, Yoko, Vic, Joshua - you guys made the day :) Thanks for sharing your time and your food with us. Next time mas organized na!

to my partners in crime in this endeavor: Junex and Daidoji. *salutes*

and to Roxane, thanks for being so patient while I spent an afternoon geeking out.

If I'm forgetting anyone here - THANK YOU!

Looking forward to the next run :D

Monday, May 9, 2011

Project 365: Day 93 - Unnecessary padding

I just realized I am 37 days behind on this blog. And counting :|

Not for the lack of trying though. And definitely not for the lack of subjects.

I think it's more like I have a lot of little projects happening at the same time. Work and personal life has been pretty hectic as well. Too many irons in the fire. Work-life balance not leaving a lot of time to blog with.

Hrm.

I need to rethink my methods.

Project 365: Day 92 - Word of Caution - Toaster Ovens

Reeeeeeeeeeeaally stupid move by me today.

Used my toaster oven to cure greenstuff on my Trollblood longriders. I've done this before several times without incident.

About 30 seconds in I hear a wet splat.

I see steam and a puddle of silver on the ceramic plate I was curing on.

The longriders pretty much exploded.

I didn't even have the toaster oven up very high. Since the minis were hollow and a bit old I suspect the minis had some water in them that steamed up.

argh.

:P lesson learned and money down the drain for me.

At least I didn't ruin the toaster oven

Friday, May 6, 2011

Project 365: Day 91 - Kaldor Draigo - Grey Knight WIP

Jeff asked me to paint his Grey Knight character Kaldor Draigo. Seeing as this is a figure I haven't painted before I jumped on the opportunity.

From the message boards that I've visited, a lot of folks prefer to work with plastic rather than metals. Some people had very strong opinions about this and I found it a bit odd. I started out in the hobby working with Privateer Press metals  and aside from the usual bent shafts and pinning I really didn't see a lof of trouble with metals to warrant such a reaction from folks.

I then realized that it may be because these folks were exposed to GW metal figures instead.

The figure itself is very ornate and looks like a fun test of skill, albeit a bit cluttered and busy in parts

As i started cataloging the items I started noticing some of the things I'll have to fix as I go alone. here you'll notice the heavy pitting on the cloth. This will have to be milliput slurried smooth
Heavy pitting on the back cloth as well
A huge tab on the shield that will be very dangerous to cut with a craft knife. I wish I had a jeweler's saw...
Another huge tab. GW must charge for the weight of the metal...
Now this is what really ticked me off. I thought the top of the banner had a very tall decoration but as i looked at it more and compared it with the GW pic I noticed I was staring at another honking tab!
The tab was thicker than the actual part!
Aside from that I also noticed these huge vent spikes all over the fig... I have pictures of them in different places but after literally the 15th one, I decided to give up taking pictures of them. The sad part here is that there are probably a few others I've missed that will show up AFTER I prime the figure

This has to be the worst though. The tip of the sword was miscast. Now I've heard of good things from GW customer service and I could get this replaced but thats just way too much trouble and time on my part. I'm better off filing this thing to shape.

The mess of tabs and vents werent the worst of it though. GW metal is significantly harder than Privateer metals and as a result, drilling was a lot more tedious and carpal tunnel -inducing. I'm normally a careful driller (I still have small drillbits from about 2 years ago) and I snapped 3 of my good drillbits on this fig alone :p. Ick.

I did manage to assemble the sucker and I'll be posting on his progress over the next few days.

Stay tuned.

Project 365: Day 90 - New Primer on Borka Kegslayer

I was in Ace Hardware in Virramall last weekend to kill time. I wandered over to the paint section and decided to try out a new white primer as I wasnt totally happy with the one I have.

I eventually settled on this:

RJ London Anti Corrosion Primer - Flat White. Blurred pic courtesy of using a pinvice for hours.
I used to use the Bosny Flourscent Flat White spray paint. It was a very flat white but I found the finish a tad grainy for my tastes, and as indicated, it wasn't really primer. RJ London manufactures Bosny and I trust them enough to try out their Anti Corrosion Primer line. It specifically states that its a metal primer so I was hoping for better adhesion and a level of "chip-proof" versus the Bosny Flourescent. The can set me back 150.00 and I'm sure you can get a better deal at your local hardware store if you can find it.

Knowing I'm trying out something I wasn't familiar with, I made sure to use the Hot Water technique before I started spraying.

The man, err Trollkin, in bare metal

I decided to use it on Borka kegslayer, whos been sitting on my desk for quite some time. After dusting off the fig and getting the hot water ready, I got down to business.


I noticed immediately that the spray nozzle was very different from the Bosny line. I prefer the wider nozzle caps as it was a lot more comfortable to use. The RJ london nozzle was a bit too narrow and felt like it was going to pop off as it tilted forward when I pressed down.

Spray-wise though the Anti Corrosion Primer dusted well enough but produced a graininess that was the same as the Bosny Flourescent. I was a bit worried at first but decided to go for a thicker coat to see if this helps.

Borka after a couple of coats. Sprayed a bit thick to compensate for the initial grainyness but overall the paint shrank better than the Bosny Flourescent. White was very flat on initial dustin but got a bit more "satin" as I sprayed on
Closeup of the primer texture. I think I may have oversprayed but all in all I dont think this is bad at all
Overall, I like the new primer so far. The paint seems to be a bit more chip resistant (at least it didn't chip off easily when I used my thumbnail). What's off-putting though is the initial grainyness on the spray even with the hot water technique which is the same problem I had with my other white spray. I guess its a characteristic white sprays have to ensure opacity. I did learn though that going for a thicker oat cuts down the grain significantly but does compromise the flatness

I may test some other white primers later on.