Taking a picture of a flower DOES make you a photographer
Drawing a stick figure DOES make you a cartoonist
Running 30 minutes a day DOES make you a runner
Writing something that begins with "roses are red" DOES make you a poet
...
it wont make you a good one though.
Savvy? ;)
note: Regular programming to resume once I get my hands on a digital camera again.

Games, art, life and anything else that spills out of my head that really, really shouldn't get out...
Monday, March 28, 2011
Wednesday, March 23, 2011
Project 365: Day 68 - I'm done with you.
I'm sick of you. I'm sick of your lies. I'm sick of your drama and your self importance. I'm sick of how when you make your choices, we always get left behind. Yet every single time you expect us to be there when you mess up or need help.
I know you're not worried. You will always have people to watch over you, people to fawn over you and people who will believe the tales that you twist like ribbons your hair could never hold when you were younger.
It's funny how a little statement from you is all it took for me to realize this. Admittedly, it was an off colored joke on my part that started it all. But what followed just showed me how petty, vindictive and ugly you are.
Don't make the mistake of thinking I'm upset due to someone else' honor. Your battles and quarrels are your own. What made me break was the fact that you would go straight for the jugular without thinking. how you would let loose a low blow so freely. How you would not hesitate to go after someone else just to hurt me.
I've always held back because of a sense of obligation and a sense of family. I now see that I don't have to.
I owe you nothing.
And from here on I will feel nothing for you.
Good luck.
I'm done with you.
Sunday, March 20, 2011
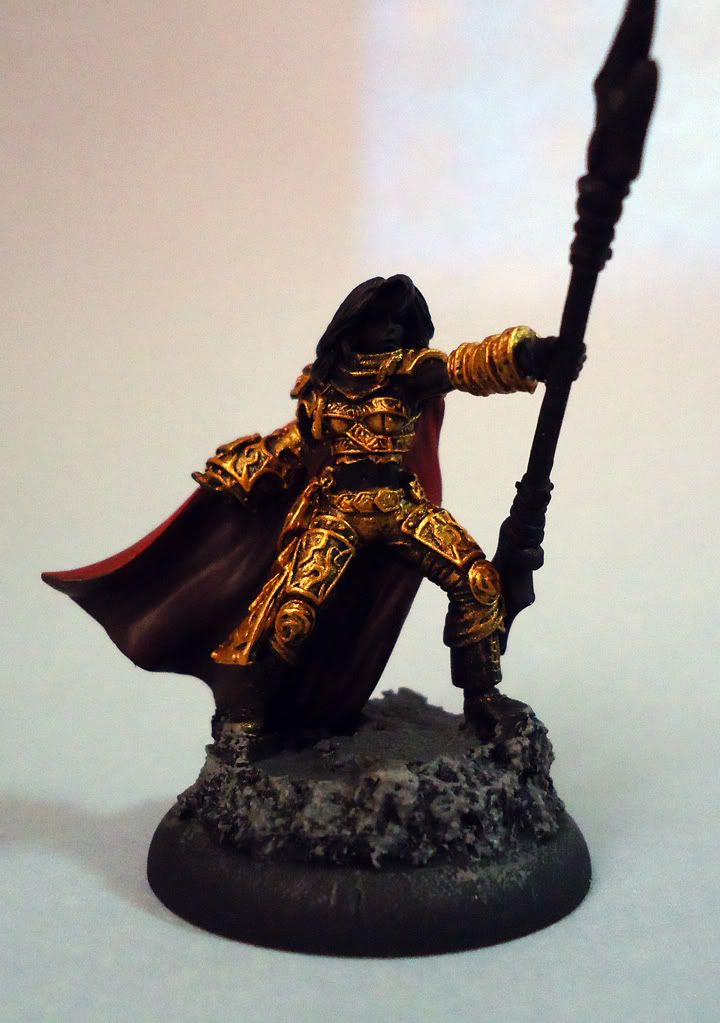
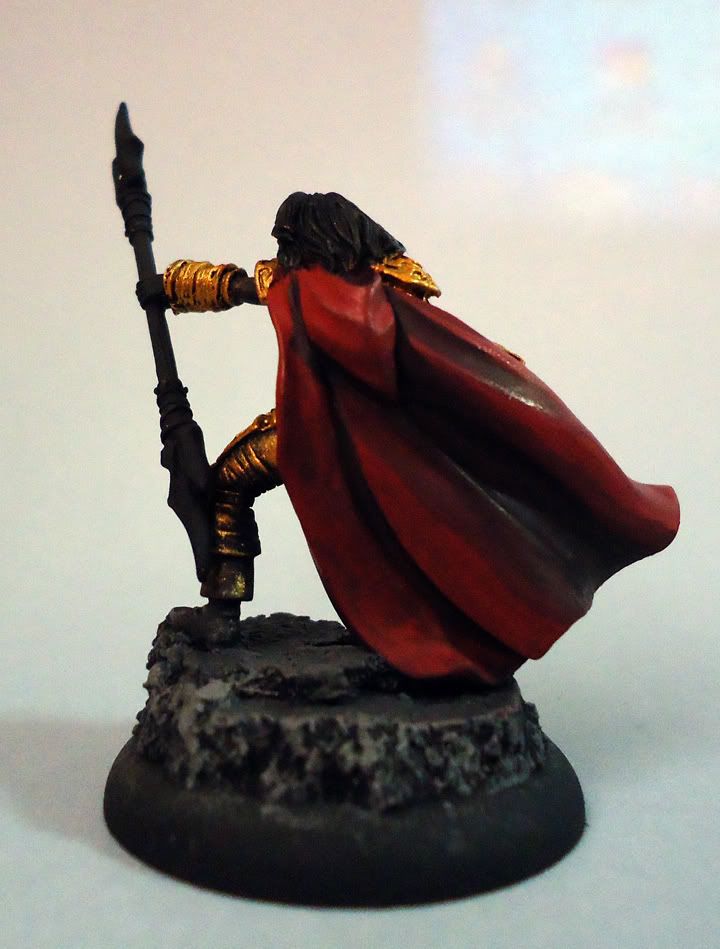
Project 365: Day 67 - Kaya Rebirth - WIP Part 3
Part 2 can be found here
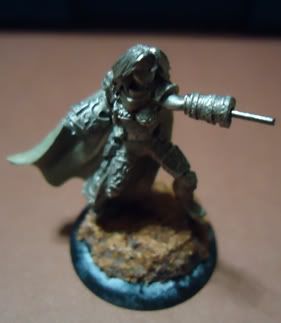
Drybrush work on the armor and base as well, Chaos Black touch ups and basecoats for the cape. The cape painted on so smoothly that I went ahead and started blocking out the shadows just to give me a good idea of how to progress with it later on.
Again the weapon hand isn't glued into place as of yet. I kinda forgot to include this bit with my previous batch of drybrushing. Need to work on that later.
Drybrush work on the armor and base as well, Chaos Black touch ups and basecoats for the cape. The cape painted on so smoothly that I went ahead and started blocking out the shadows just to give me a good idea of how to progress with it later on.
 |
| Various P3 grays for the rock base. I will need to wash some green in there later on for a more convincing rock effect. |
 |
| Didn't expect the milliput paste to make such a big difference. You can't see much of the effect in the pic but you will definitely feel the smoothness once you lay brush to figure. |
Again the weapon hand isn't glued into place as of yet. I kinda forgot to include this bit with my previous batch of drybrushing. Need to work on that later.
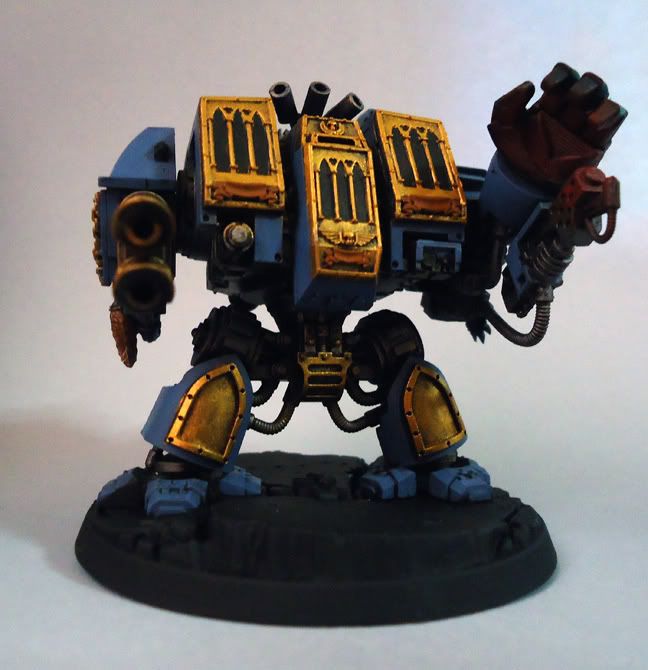
Project 365: Day 66 - Spacewolf Dread WIP Part 3
Part 2 can be found here.
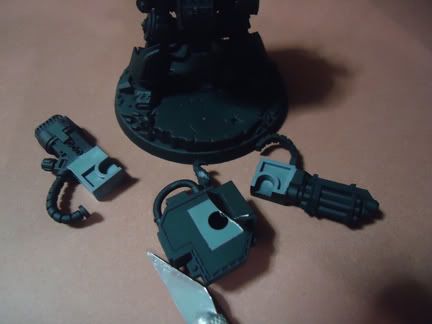
More work on the Spacewolf Dreadnaught. Just basecoats and some drybrushing. Also note the beginnings of OSL work on the flamer and hand.
What do you think?
I really don't know what direction I'm going with this dreadnaught. Note the shins and the sarcophagus panels. French Arches and trefoils make me think of going "stained glass windows" on the shins for a "church" look. But this is a Spacewolf 'naught so...yeah. Not the most religious folks out there.
More work on the Spacewolf Dreadnaught. Just basecoats and some drybrushing. Also note the beginnings of OSL work on the flamer and hand.
What do you think?
 |
| I'm thinking of making the flamer and the immediate area round it glow hot as if he'd been firing his flamer for a good while. |
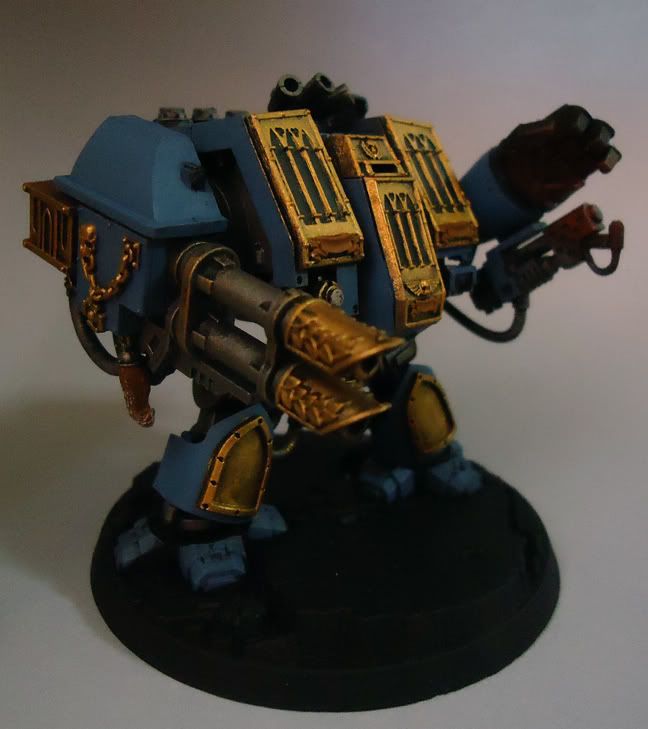 |
| A better view of the twin cannons |
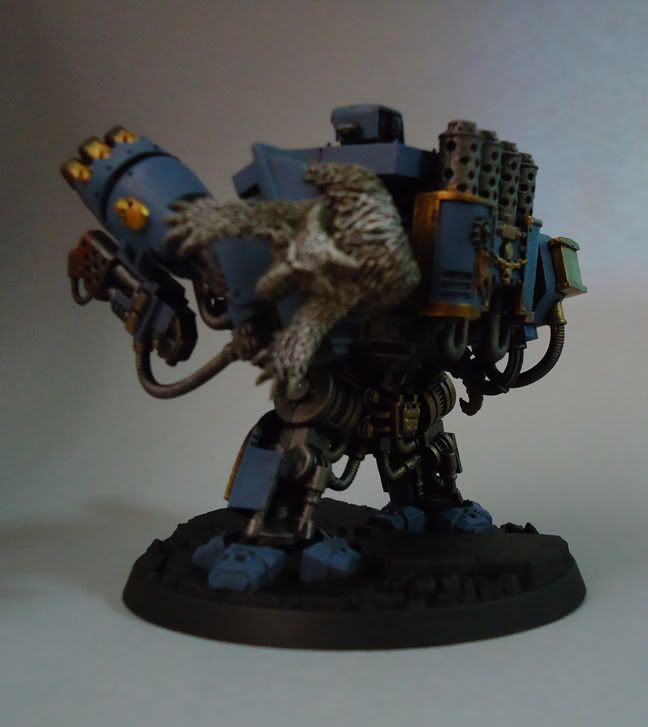 |
| I may tweak the colors of the pelt a bit... |
Project 365: Day 65 - Skinwalker WIP
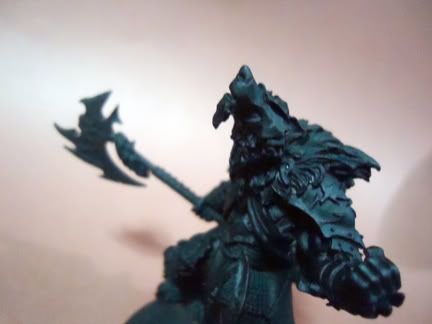
Some drybrush work on stuff.
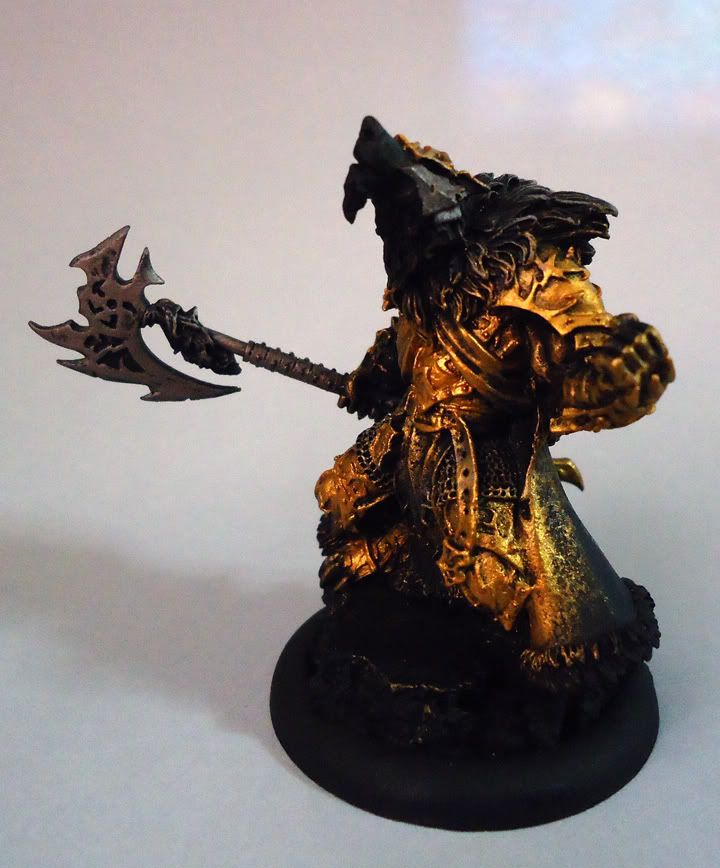
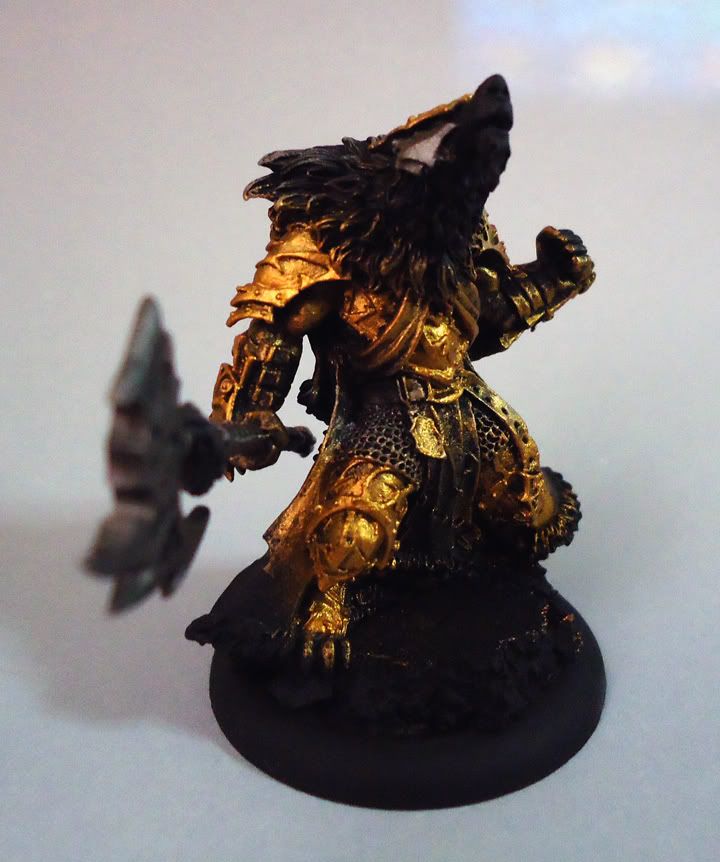
The Circle Orboros Warpborn Skinwalker Unit Leader. I have two units of these guys and I was just lucky that they figure into the eKaya Tier List. I really didn't care about their rules (they're okay, if a bit vanilla. They do provide a much needed brick wall though), I just couldn't pass up werewolves in armor with halberds.
Kim asked me once why I do the metallics first. It's more about the paint than any other reason. Metallic paint doesn't flow as well as other acrylics. In order to have a solid metal coat I find that either drybrush the paint on or apply it in thicker layers than I'm comfortable with. Thin coats don't necessarily mean good flow either. Worse is if you thin it enough or use a medium you run the risk of getting a "glitter effect" or have the metal pigment gather into corners and dull the detail.
Drybrushing allows a good, thin solid coat of metallic paint. Downside here is that it tends to be messy so I do it prior to everything else.


I do several passes of gold (GW or P3, usually a mix) and touch up with GW Chaos Black on the non metallic parts. Chaos black is essential as it is the mattest black I've seen so far while still being thin and offering good coverage. I wish P3's black was more like Chaos Black but it has a more satin finish. I usually just use P3 Thamar Black for mixing.
The Circle Orboros Warpborn Skinwalker Unit Leader. I have two units of these guys and I was just lucky that they figure into the eKaya Tier List. I really didn't care about their rules (they're okay, if a bit vanilla. They do provide a much needed brick wall though), I just couldn't pass up werewolves in armor with halberds.
Kim asked me once why I do the metallics first. It's more about the paint than any other reason. Metallic paint doesn't flow as well as other acrylics. In order to have a solid metal coat I find that either drybrush the paint on or apply it in thicker layers than I'm comfortable with. Thin coats don't necessarily mean good flow either. Worse is if you thin it enough or use a medium you run the risk of getting a "glitter effect" or have the metal pigment gather into corners and dull the detail.
Drybrushing allows a good, thin solid coat of metallic paint. Downside here is that it tends to be messy so I do it prior to everything else.
I do several passes of gold (GW or P3, usually a mix) and touch up with GW Chaos Black on the non metallic parts. Chaos black is essential as it is the mattest black I've seen so far while still being thin and offering good coverage. I wish P3's black was more like Chaos Black but it has a more satin finish. I usually just use P3 Thamar Black for mixing.
Monday, March 14, 2011
Sunday, March 13, 2011
Project 365: Day 63 - Le Creperie
This article is long overdue.
Last year, Roxane and I were discussing how I missed having a good crepe. Roxane wasnt really big on crepes and couldn't relate to my cravings. We had a couple of crepes in French Baker a while back and while it was okay, it definitely wasn't something to write home about.
We stumbled on La Creperie in Robinson's Galleria a couple of days after the discussion. It was still in a "soft opening" stage and the place was empty of customers. Seemed like a clear sign that someone out there is answering my food related prayers.
This is how everything went down during our first visit:
While you eat, french music pumps from the speakers discreetly. I don't know if the owners just chose the songs for their "frenchness" as some of the songs are obviously more geared towards blue collar than high end. I don't speak the language but you can tell the songs didn't have dining in mind. I would suggest that they check out the Ratatouille soundtrack from Disney/Pixar. That may come off as cliche but it should set the mood perfectly
La Creperie has a few more places opened around the metro, notably one in Eastwood. It has crepes for those craving sweets and those looking to try something different for lunch. The place will set ya back around 200 - 300Php per person. La Creperie also offers coffee, hot chocolate (an "authentic" french one that I'm eager to try) and lots of tea.
It's one of those places where they successfully blend high-end product and preparation with accessibility and a reasonable price range.
If it were up to me, I'd have the Salidou once a day everyday and I know I will never get tired of it.
Last year, Roxane and I were discussing how I missed having a good crepe. Roxane wasnt really big on crepes and couldn't relate to my cravings. We had a couple of crepes in French Baker a while back and while it was okay, it definitely wasn't something to write home about.
We stumbled on La Creperie in Robinson's Galleria a couple of days after the discussion. It was still in a "soft opening" stage and the place was empty of customers. Seemed like a clear sign that someone out there is answering my food related prayers.
This is how everything went down during our first visit:
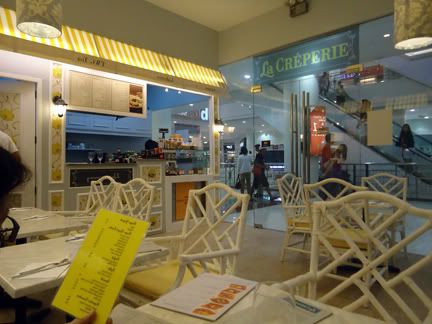 |
| The interior. Yes the photo is flipped to show the store sign. I have this weird aversion to taking pics of storefronts after seeing "Coming to America". No, I can't explain it either. |
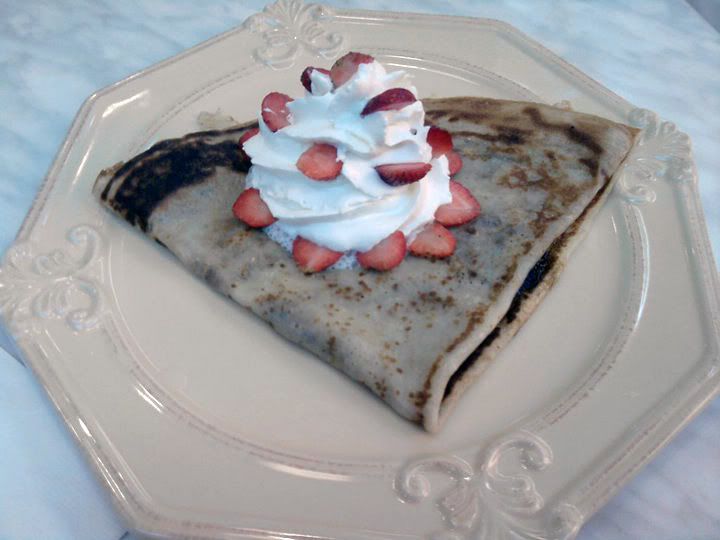 |
| La Christine: the first crepe that Roxane ordered. You can tell that the chef burned the crepe a bit and made the crepe crisp. Now I dont mind that, I usually like burned food but Roxane wasn't impressed. To be honest I wasn't either. The strawberries were a bit too tart and the entire dish didn't have a good lasting impression. None of the flavors stood out. Seems like were off to a shaky start. |
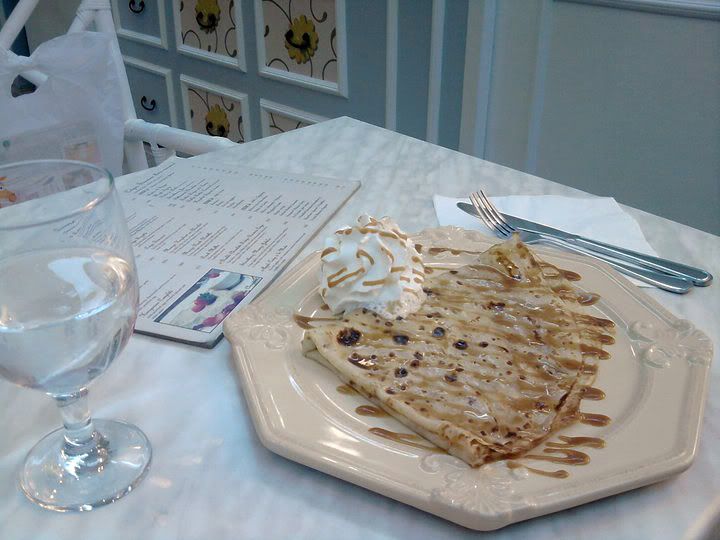 | ||
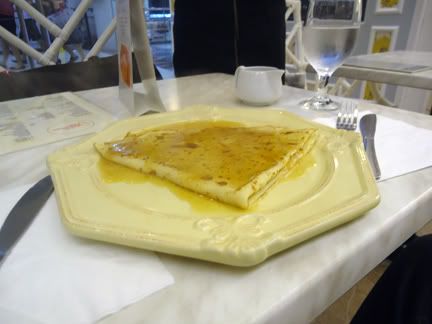
| Salidou: Roxane wasn't happy about her strawberry crepe and I think one of the reasons was that I had the Salidou. In my opinion, this crepe is a superstar. The Salidou is a simple crepe with whipped cream and a drizzling of salt caramel. The caramel is so good (not too sweet, not too thick) that I immediately asked if they sold it separately. I was given a very disappointing "no". Now the only way I can get the caramel is if I eat at La Creperie. Genius bastards. |
At the first visit, La Creperie is coming off as a little uneven. From the very mediocre La Christine to the great impression that the Salidou left, the polite but sometimes distracted and inattentive service and the varied quality of the crepes (Roxane's was overcooked, mine was just right), the place is showing the signs of a soft opening but seems to be adapting well.
Roxane and I loved the Salidou so much that we dedided that the place deserves a second visit. I'm glad to say that some of the concerns during the soft opening were addressed and the place is now one of our places to go to.
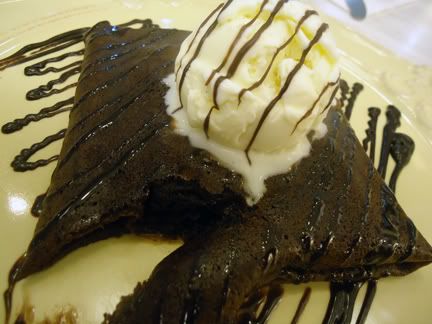 |
| Double Chocolate Fudge Brownie: A chocolate brownie wrapped in a chocolate crepe drizzled in chocolate sauce. Personally I stay away from chocolate redundancies but this is a crepe that I'm willing to make an exception on. The crepe isn't rubbery like most that I've encountered. This shows a discipline in making the crepe batter as most people would over-mix to get the chocolate in. The crepe was tender and the melting vanilla ice cream softened the brownie creating a good play of textures. A bit too sweet for me but that's more about preference than anything. |
 | |
| Crepe Suzette: this is a very Your Mileage May Vary crepe. If you've had a suzette or orange marmalade before you'll know what to expect. For the rest of you, its a crepe with orange marmalade and bourbon. The liquor is lit and an eerie blue flame plays over the crepe for a few seconds. You can barely make out the flames when they set up the dish in front of you and I wish they'd dim the lights to give the dish a bit more spectacle. Now I say YMMV because its bitter. Its a combination of the sweet and the bitter from the marmalade and the bitter and burn from the bourbon. I love this. Roxane..not so much. |
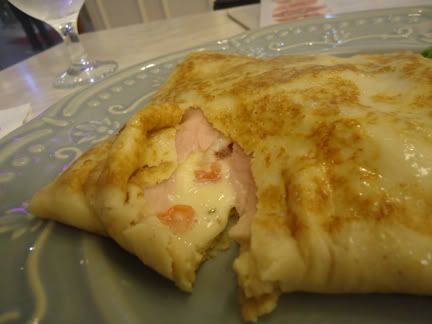 |
| Le "J.J.": If sweet crepes aren't your thing, La Creperie offers savory ones too. This is another superstar. Ham, tomatoes, chili flakes and gruyere cheese melted inside a tender crepe. Pricey but very much worth it. Don't let the chili flakes scare you off as this isn't a really spicy dish. The spice is noticeable but only to highlight the other flavors. |
La Creperie has a few more places opened around the metro, notably one in Eastwood. It has crepes for those craving sweets and those looking to try something different for lunch. The place will set ya back around 200 - 300Php per person. La Creperie also offers coffee, hot chocolate (an "authentic" french one that I'm eager to try) and lots of tea.
It's one of those places where they successfully blend high-end product and preparation with accessibility and a reasonable price range.
If it were up to me, I'd have the Salidou once a day everyday and I know I will never get tired of it.
Saturday, March 12, 2011
Project 365: Day 62 - A box of ideas.
Just a look at whats inside my toolbox.
I've been way behind on this blog. By my count I'm behind by 11(?) days. Thats not good :p
Again, as I often do, I wont dwell on the cause of delay but rather take the time to refocus myself and my goals for the community and with this blog:
A hobby blog with comprehensive information on where to find tools, supplies and what to substitute for things you can't find this side of the world.
I'm not going to change the minds of the vets nor will i be offering anything revolutionary to the art and the minis community in the Philippines. What I will do though is attempt to make the process of getting started easier and to give those who are getting into the hobby a chance to avoid the pitfalls that I myself and a lot of others have fallen into.
Organize a Miniature Figure Painters Gathering
Discussions can be found in the MWPH Forum
If you have any ideas or are willing to contribute or just want to pop in to see whats going on please dont hesitate to click the link above.
Those are two of the main goals I have for the next quarter if the year. I hope I can get some of it rolling and if I can manage to do that then the rest of the year is looking exciting indeed.
Laters.
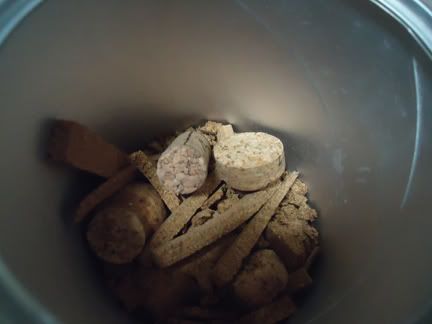 |
| Cork! I make it a point to keep cork from wine and cork scrapscast off from whole sheet. They're very usueful for bases and terrain. |
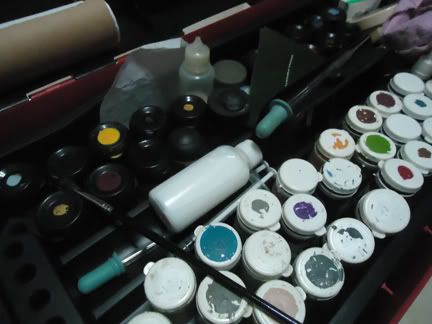 |
| My chaotic toolbox. |
Again, as I often do, I wont dwell on the cause of delay but rather take the time to refocus myself and my goals for the community and with this blog:
A hobby blog with comprehensive information on where to find tools, supplies and what to substitute for things you can't find this side of the world.
I'm not going to change the minds of the vets nor will i be offering anything revolutionary to the art and the minis community in the Philippines. What I will do though is attempt to make the process of getting started easier and to give those who are getting into the hobby a chance to avoid the pitfalls that I myself and a lot of others have fallen into.
Organize a Miniature Figure Painters Gathering
Discussions can be found in the MWPH Forum
If you have any ideas or are willing to contribute or just want to pop in to see whats going on please dont hesitate to click the link above.
Those are two of the main goals I have for the next quarter if the year. I hope I can get some of it rolling and if I can manage to do that then the rest of the year is looking exciting indeed.
Laters.
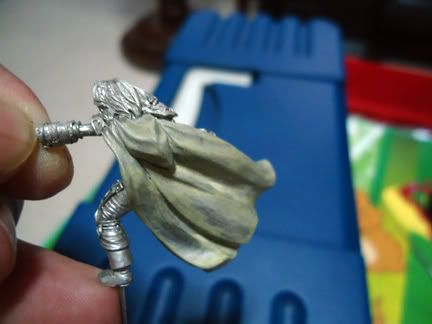
Project 365: Day 61 - Kaya Rebirth - WIP Part 2
View Part 1
Some more work with my favorite warlock.
Stay tuned for Part 3.
Some more work with my favorite warlock.
 |
| Added some torn cork to the base and sealed it with super glue. The white stuff you see is the "crazing" or frosting effect from the glue. For this stage the frosting isn't a problem as ill be painting over it later. |
 |
| One final test fit before comitting. Luckily I did this and found that the glue swelled up the cork so Kaya wouldnt fit in the holes I made earkier, Easily fixed with a few good strokes from a hobby knife. I also made sure to trim the pin at the arm to accomodate the hand and weapon. |
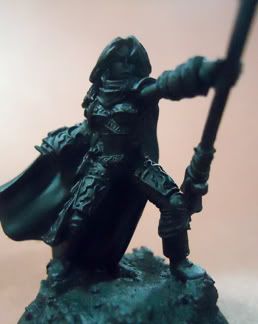 | ||||
| After priming. I must note that the hand isnt glued yet. I will be painting the majority of the fig without the hand so I dont have the weapon getting in the way of my brush. |
Project 365: Day 60 - Spacewolf Dread WIP Part 2
If you haven;t, please make sure to check out Part 1.
Wasn't able to get a lot done on this particular model due to some unforseen developments. I was able to prime the dread as you can see below.
Stay tuned for Part 3.
Wasn't able to get a lot done on this particular model due to some unforseen developments. I was able to prime the dread as you can see below.
 |
| Here I sliced off the tape covering the holes and tabs. I also removed the tape covering the insert tabs for the weapons options. I did this to make sure that the attachment points are not too snug from that layer of primer. If i primed over the tabs, the primer will scrape off or worse yet gum and jam up the insertion point and break a tab. |
 |
| Here you can see the greenstuffed fur nicely blending in with the rest of the fur. You can hardly tell it wasnt part of the model unless you were looking for it. |
 |
| Arms attached and this guy is ready for drybrushing and basecoating. |
Stay tuned for Part 3.
Monday, March 7, 2011
Project 365: Day 59 - Kaya Rebirth - WIP Part 1
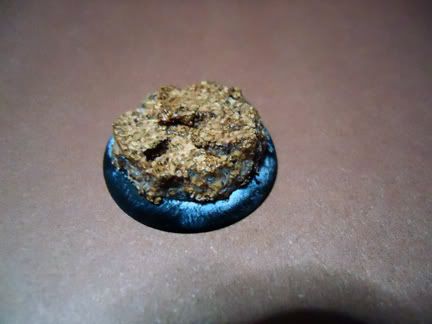
After Kaya's brakefluid bath the paint sloughed off beautifully. Unfortunately the brakefluid deformed the base. This was the first time I experienced brakefluid deforming plastic bases after stripping quite a few figs so that came as a surprise. Fortunately I was able to find a spare.
As I was cleaning the fig I started noticing the moldlines and pitting in the metal that I was not able to take care of before. I'm going to take my time with this fig and try to "level up" my skill so I'm going to try a trick I read about: The Milliput cream
The milliput cream filled in the pits and scratches beautifully and sanded well after it was fully dry. One thing to watch out for is that the cream can fill in and obscure detail so make sure you're carefull applying the cream. If you accidentally paint over detail wipe the cream off immediately with a wet q-tip and a needle if necessary.
Go to Part 2
As I was cleaning the fig I started noticing the moldlines and pitting in the metal that I was not able to take care of before. I'm going to take my time with this fig and try to "level up" my skill so I'm going to try a trick I read about: The Milliput cream
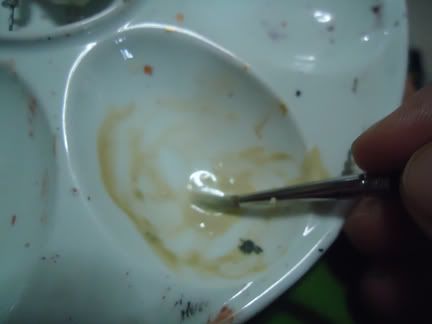 |
| I dissolved a small amount of mixed milliput into a cream that I could paint on the fig. I used an old brush for this as the putty will probably ruin a good brush |
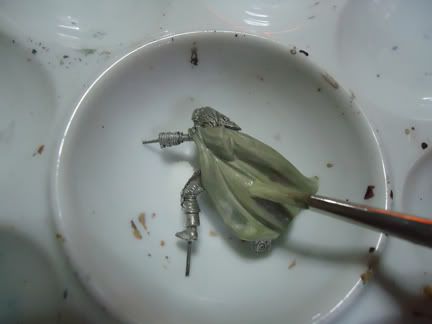 |
| I painted the cream on the areas I need smooth. The Kaya fig was well-cast but there was some pitting that sanding and filing cant fix. The milliput cream will fill in those pits and sanding will leave an ultrasmooth finish. |
 |
| The milliput cream after drying. I also did the inside area of the cape. |
The milliput cream filled in the pits and scratches beautifully and sanded well after it was fully dry. One thing to watch out for is that the cream can fill in and obscure detail so make sure you're carefull applying the cream. If you accidentally paint over detail wipe the cream off immediately with a wet q-tip and a needle if necessary.
Go to Part 2
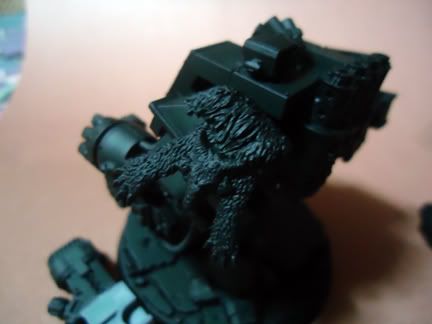
Project 365: Day 58 - Spacewolf Dread WIP Part 1
Fuck I'm way behind on my commission work
Anyway, I finally got some work done. Primed 12 (?) spacewolves for Felix and worked on his dreadnaught. This would be the first time painting a 40k dreadnaught so this ought to be fun.
Normally when taking tabletop work I dont assemble and paint them as is. Not being an expert in WH40k I really wouldnt know the weapons configurations and WYSIWIG madness. I paint them as they come.
Sometimes though they come in states that would require repair. This time, the dread just came a little...unfinished.
I'll prime this bad boy up and post the succeeding steps here so stay tuned.
Part 2 is up!
Anyway, I finally got some work done. Primed 12 (?) spacewolves for Felix and worked on his dreadnaught. This would be the first time painting a 40k dreadnaught so this ought to be fun.
Normally when taking tabletop work I dont assemble and paint them as is. Not being an expert in WH40k I really wouldnt know the weapons configurations and WYSIWIG madness. I paint them as they come.
Sometimes though they come in states that would require repair. This time, the dread just came a little...unfinished.
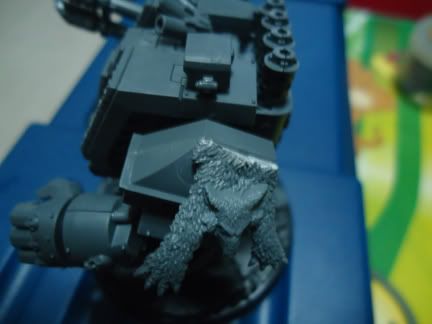 |
| The dreadnaught is decorated with this fur piece. You can see clearly where the cut was made. |
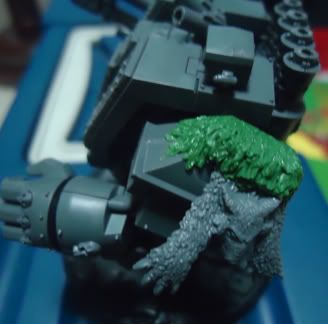 |
| A little greenstuff camouflages the problem. |
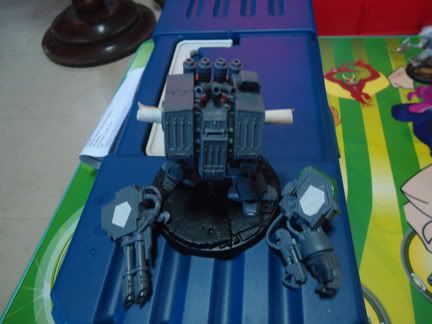 |
| I tape up the peg and holes before priming. |
I'll prime this bad boy up and post the succeeding steps here so stay tuned.
Part 2 is up!
Subscribe to:
Posts (Atom)